
Why Every Home Baker Needs This Peach Cobbler Recipe
A perfect peach cobbler recipe requires just six simple ingredients and delivers the ultimate summer comfort dessert. Here’s what you need to know:
Essential Components:
- Fresh peaches (6-8 medium or 10 cups sliced)
- Sugar (brown and white for depth)
- Flour (all-purpose or self-rising)
- Butter (cold for biscuit topping, melted for cake-style)
- Milk or buttermilk (for richness)
- Cornstarch (1 tablespoon prevents runny filling)
Two Main Styles:
- Biscuit-topped – Drop spoonfuls of dough over fruit
- Cake-style – Pour batter that rises through peaches
Quick Method: Bake fruit filling 10 minutes first, add topping, then bake 30-40 minutes more at 375°F.
There’s something magical about peach cobbler that transforms a simple fruit dessert into pure comfort food nostalgia. As one home baker shared about her family recipe, “This recipe STARTED IT ALL… probably why I’m sitting here today!”
The beauty of cobbler lies in its forgiving nature. Unlike finicky pies with their temperamental crusts, cobbler welcomes imperfection. The dropped biscuit topping creates that signature “cobblestone” look that gives this dessert its name.
Peak peach season runs from June through August, making summer the perfect time to master this technique. But don’t worry – this recipe works beautifully with frozen or even well-drained canned peaches when fresh ones aren’t available.
Whether you’re planning a backyard barbecue in New York City or simply craving that perfect balance of tart fruit and sweet, buttery topping, this guide will walk you through every step to cobbler perfection.
, preparation steps from peach selection to final baking, serving suggestions with ice cream, and storage tips for leftovers - peach cobbler recipe infographic")
Easy peach cobbler recipe glossary:
What Makes a Cobbler a Cobbler?
The secret to understanding peach cobbler recipe success lies in knowing what makes this dessert unique among fruit desserts. At its heart, a cobbler is a deep-dish baked fruit dessert topped with biscuit dough or cake-style batter that’s dropped or spooned over the fruit – never rolled out like pie crust.
The name “cobbler” comes from that wonderfully imperfect, bumpy appearance of the topping. When you drop spoonfuls of dough over your peaches, it creates a rustic cobblestone look that’s actually the hallmark of authentic cobbler. Those irregular peaks and valleys aren’t mistakes – they’re exactly what you want! They allow steam to escape during baking and create those delightful texture contrasts between tender fruit and fluffy topping.
Cobbler vs Crisp vs Crumble: Key Differences
Here’s where many home bakers get confused. While these three desserts all feature baked fruit, they’re quite different creatures:
Cobblers use biscuit dough or cake-like batter that’s dropped over fruit, creating a soft, bread-like texture on top. The magic happens with buttermilk and cold butter working together to create that perfect rise. Crisps rely on oat topping mixed with nuts, butter, and sugar for their signature crunch. Crumbles skip the oats entirely, using just flour, butter, and sugar for a more delicate, sandy texture.
The key difference? Butter ratio and preparation method. While crisps and crumbles depend on fat-to-flour ratios for their crunch, cobblers use leavening agents like baking powder to create their characteristic fluffy rise. When you bite into a proper cobbler, you should get that satisfying contrast between the tender, juicy fruit below and the biscuit-like topping above.
Brief History of Peach Cobbler
Peach cobbler has deep roots in the American South, where peaches thrived in the warm climate and resourceful cooks needed practical solutions. Pioneer cooking often meant making do with limited ingredients and tools. Without proper pie pans or enough flour for double crusts, clever home cooks created this simpler version using just a basic baking dish and simple topping.
The beauty of cobbler lies in its forgiving nature – even novice bakers could achieve success. This made it perfect for feeding large families with relatively few ingredients. Over time, regional twists emerged across the South, with some areas preferring fluffy biscuit toppings while others favored pourable cake-like batters. Both styles remain popular today, each offering its own delicious take on this classic comfort dessert.
Choosing & Preparing the Perfect Peaches
The secret to an unforgettable peach cobbler recipe lies in selecting peaches that are perfectly ripe—not too firm, not too soft, but just right. Think of it like Goldilocks, but for fruit! You want peaches that yield slightly when you press them gently, almost like they’re whispering “I’m ready” under your touch.
When shopping for peaches, look for that telltale sweet fragrance at the stem end. A good peach should smell like summer itself. The skin should show beautiful golden undertones (for yellow varieties) without any stubborn green patches that scream “I’m not ready yet!” Avoid peaches with bruises or soft spots—they’ll turn your cobbler into a mushy mess faster than you can say “dessert disaster.”

The biggest mistake home bakers make? Using overripe peaches that release too much juice during baking. These soggy culprits will leave you with a watery filling that no amount of cornstarch can save. Trust me, I’ve been there!
Peach Varieties & When to Substitute
Understanding peach varieties makes all the difference in your baking success. Freestone peaches are your best friends for cobbler—the pit practically falls out when you slice them, making prep work a breeze. Clingstone varieties can work too, but you’ll spend more time wrestling with stubborn pits that cling to the flesh like they’re afraid of heights.
White peaches tend to be sweeter and more delicate, while yellow peaches offer that classic peachy flavor with a bit more tartness that balances beautifully with sugar in baking.
But what if fresh peaches aren’t available? Don’t panic! Frozen unsweetened peaches work wonderfully—just use about 40 ounces (roughly 2.5 pounds), thaw them completely, and pat them dry with paper towels. The key is removing excess moisture that could make your cobbler soggy.
Canned peaches packed in juice (not syrup) are another solid option. You’ll need two 16-ounce cans, thoroughly drained. Here’s the math that’ll make your life easier: 6-8 medium fresh peaches equals 2 cans or 40 ounces frozen.
When using alternatives to fresh peaches, add an extra tablespoon of cornstarch to your filling. This little trick helps absorb any extra moisture and keeps your cobbler from turning into peach soup.
Smart Prep Tools & Gadgets
The right tools transform peach prep from tedious chore to enjoyable ritual. A sharp vegetable peeler works wonders on firm peaches, while a paring knife gives you precision for trickier spots. For mixing your biscuit topping, a pastry cutter creates those perfect coarse crumbs that make cobbler tops so irresistible.
Here’s a game-changing technique: the blanch-and-shock method for easy peeling. Score a small “X” on the bottom of each peach, drop them in boiling water for just 30 seconds, then plunge them into an ice water bath. The skins will slip off like magic—it’s oddly satisfying!
For those sweltering summer days when you can’t bear to turn on the oven, consider a Slow Cooker Peach Cobbler. It delivers all the comfort of traditional cobbler without heating up your kitchen.
Whether you’re slicing versus chunking depends on your texture preference. Thin slices cook more evenly and create an neat presentation, while chunks give you those delightful bursts of peachy goodness in every bite.
Mastering Toppings & Textures
The topping transforms your peach cobbler recipe from ordinary to extraordinary. After testing countless variations, we’ve finded that success comes down to understanding two fundamental approaches – each creating its own delightful personality.
Think of cobbler toppings like choosing between a cozy sweater and a crisp button-down shirt. Both are wonderful, but they serve different moods and occasions. The biscuit style wraps your peaches in tender, flaky comfort, while the cake-style approach offers foolproof simplicity that never fails to impress.
Want to lift your cobbler? Small additions make big differences. A whisper of ground ginger (just 1/8 teaspoon) brightens the peach flavor without overpowering it. Cinnamon and nutmeg add warmth that says “home,” while a splash of vanilla extract deepens the overall flavor profile. For adult gatherings, a tablespoon of bourbon creates sophisticated depth, and toasted pecans scattered over the top provide delightful crunch.
Biscuit-Style Topping (Reader Favorite)
This style consistently earns five-star reviews from home bakers across New York City and beyond. There’s something magical about how the tender, flaky topping contrasts with the soft, syrupy fruit below.
The secret lies in treating your ingredients with respect. Cold butter isn’t just a suggestion – it’s essential. When cold butter hits the oven’s heat, it creates steam pockets that result in those coveted flaky layers. Cut it into your flour mixture until it resembles coarse meal, like tiny pebbles scattered through sand.
Buttermilk brings two gifts to your cobbler: tanginess that balances the sweet fruit and natural acidity that creates an incredibly tender crumb. The drop method might look rustic, but it’s actually genius – those irregular peaks and valleys allow steam to escape while creating the signature cobblestone appearance that gives cobbler its name.
Here’s where many bakers stumble: they overmix the dough. Once you add the liquid, stir just until the ingredients come together. The mixture should look shaggy and slightly rough. Overmixing develops gluten, turning your tender topping into something chewy and dense.
Cake-Style & Batter-Pour Methods
If biscuit-style is the artisanal approach, cake-style is the reliable friend who never lets you down. This method offers consistent results and forgives small mistakes, making it perfect for busy weeknights or when you’re baking for a crowd.
The beauty starts with self-rising flour, which eliminates the guesswork of measuring baking powder and salt separately. This ingredient does the heavy lifting, ensuring your topping rises properly every time.
The no-stir layering technique feels almost too simple to work, but trust the process. You’ll melt butter directly in your baking dish, pour the thin batter over it, then spoon the seasoned peaches on top. Don’t worry if the batter seems runny – it firms up beautifully during baking.
As the cobbler bakes, magic happens. The thin batter encounters the hot, melted butter and begins rising through the fruit syrup, creating distinct layers of texture and flavor. The bottom develops a slightly crispy crust while the top becomes golden and cake-like. It’s like watching culinary science in action, and the results never fail to impress.
Step-by-Step Peach Cobbler Recipe (The Ultimate peach cobbler recipe)
There’s something deeply satisfying about creating the perfect peach cobbler recipe from scratch. After testing countless variations, we’ve developed this comprehensive method that combines the best techniques to deliver consistent, crowd-pleasing results every time.
You’ll need a 9×13-inch baking dish for this recipe, which generously serves 8-10 people. Have your large mixing bowls, measuring cups and spoons, and a pastry cutter (for the biscuit version) ready before you begin.
The secret to cobbler success lies in pre-baking the fruit filling. This crucial step concentrates the peach flavors and prevents that dreaded soggy bottom that can ruin an otherwise perfect dessert. Start by preheating your oven to 375°F (190°C) and thoroughly greasing your baking dish.
Here’s where the magic happens: prepare your peaches using your preferred method, then pre-bake the fruit mixture for 10 minutes. This initial baking creates the foundation for a cobbler that holds its shape beautifully and delivers intense peach flavor in every bite.
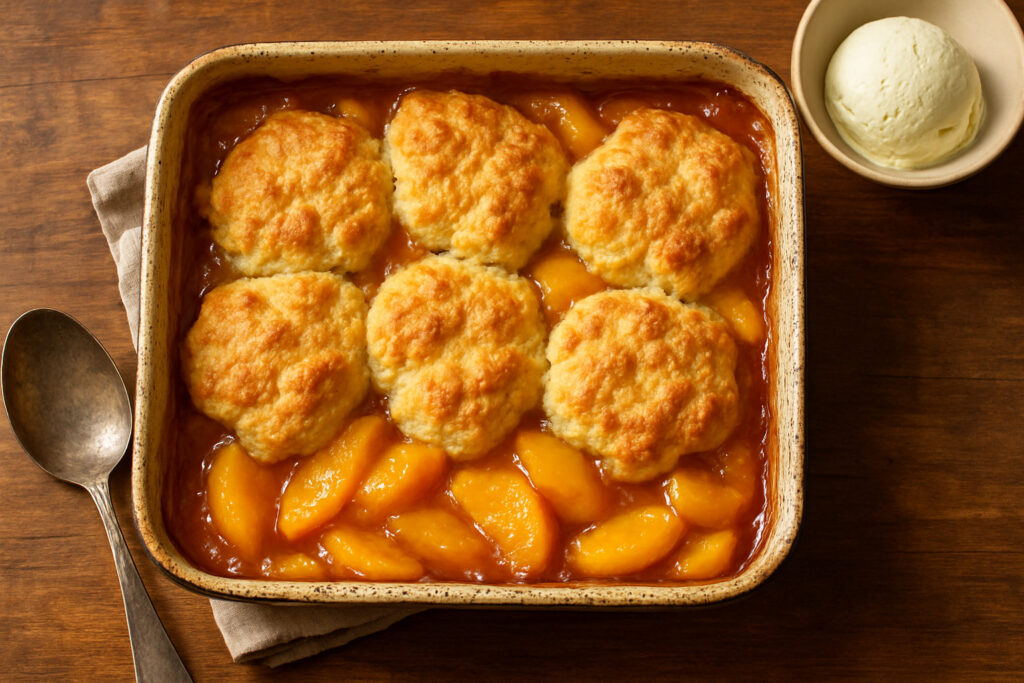
Classic Homemade peach cobbler recipe (Biscuit Top)
This biscuit-topped version consistently earns the highest praise from home bakers. The combination of 10 cups fresh peaches with 1/4 cup brown sugar, 1 tablespoon cornstarch, 1 teaspoon vanilla extract, 1/2 teaspoon cinnamon, and 1/4 teaspoon salt creates a filling that’s perfectly balanced between sweet and tart.
For the signature biscuit topping, you’ll combine 1 cup all-purpose flour, 1/2 cup sugar, 1 1/2 teaspoons baking powder, and 1/2 teaspoon salt. The key is cutting in 6 tablespoons of cold butter until the mixture resembles coarse crumbs – this creates those delightful flaky layers that make biscuit cobbler so irresistible.
Start by tossing your peaches with the brown sugar mixture and baking for those crucial 10 minutes. While the fruit warms, prepare your biscuit dough by cutting the cold butter into the dry ingredients, then stirring in 1/2 cup buttermilk just until combined. Overmixing is the enemy of tender biscuits!
Drop spoonfuls of dough over the warm fruit – don’t worry about making it perfect. That rustic, cobblestone appearance is exactly what you’re after. Brush the dough with a beaten egg and sprinkle with 2 tablespoons cinnamon sugar for that gorgeous golden finish.
Bake for 30-40 minutes until the topping is golden brown and the fruit is bubbling around the edges. The aroma alone will have your family gathering in the kitchen!
Cake-Like peach cobbler recipe (Pour-Over Batter)
If you prefer simplicity without sacrificing flavor, this cake-style version delivers incredible results with minimal effort. Using 8 cups sliced peaches tossed with 1/4 cup sugar, you’ll create a slightly more refined texture that’s perfect for dinner parties.
The magic begins when you melt 1 stick of butter directly in your baking dish in the preheated oven. While it melts, whisk together 3/4 cup sugar, 3/4 cup self-rising flour, and 3/4 cup milk until smooth. The batter might seem thin, but trust the process – it transforms beautifully during baking.
Here’s where willpower comes in: pour the batter over the melted butter and resist the urge to stir. Then spoon the sugared peaches over the batter and step away. The layers will create themselves during the 45-50 minute baking time, resulting in distinct layers of cake, fruit, and a slightly crispy bottom crust.
Both methods pair beautifully with vanilla ice cream for the ultimate summer dessert experience. The contrast between the warm, bubbling cobbler and cold, creamy ice cream creates pure dessert magic.
For those who enjoy exploring different baked goods, our collection of Scones offers wonderful complementary treats that pair beautifully with cobbler for afternoon tea or brunch gatherings.
Pro Tips, Variations, Storage & Freezing
After years of perfecting this peach cobbler recipe, I’ve learned that the difference between a good cobbler and an unforgettable one often comes down to mastering a few key techniques. These professional secrets will help you avoid the most common pitfalls that can turn your summer dessert dreams into soggy disappointments.
The biggest enemy of great cobbler? Excess moisture. Nothing ruins the magic quite like a watery filling that makes your beautiful topping sink into a soggy mess. The solution is surprisingly simple: use exactly 1 tablespoon cornstarch per 8-10 cups of fruit, and always drain thawed frozen or canned peaches thoroughly. I like to pat them dry with paper towels after draining – it might seem fussy, but it makes all the difference.
Pre-baking the fruit for those first 10 minutes isn’t just a suggestion – it’s your secret weapon. This step concentrates the peach flavors and gives the cornstarch time to work its thickening magic before the topping goes on.
For the topping, cold butter is your friend. Keep it chilled until the very moment you cut it into the flour mixture. Room temperature butter creates dense, heavy toppings that nobody wants. And please, resist the urge to overmix that biscuit dough – a few lumps are perfectly fine and will give you the tender, flaky texture you’re after.

Common Mistakes & How to Fix Them
Let’s talk about the mistakes that make even experienced bakers want to throw their aprons in the corner. Soggy bottom syndrome tops the list – you know, when you cut into your cobbler and find a puddle of fruit juice instead of a properly set filling. This usually happens when there’s too much moisture or not enough thickening agent. If you’re prone to this problem, try increasing your cornstarch by half a teaspoon.
Dense, heavy topping is another heartbreaker. When your beautiful cobbler comes out of the oven looking more like a brick than a fluffy cloud, the culprit is usually overmixed dough or butter that wasn’t cold enough. The fix? Mix your dough just until it comes together – it should look shaggy and rough, not smooth.
Temperature troubles plague many home bakers too. If your top burns while the bottom stays raw, your oven is running too hot or your rack is positioned too high. Stick to 375°F maximum and keep your cobbler in the center of the oven. If the top starts browning too quickly, tent it with foil for the remaining baking time.
Finally, flavor imbalance can turn a promising cobbler bland. All that sweetness needs some acid to brighten it up. Add 1-2 tablespoons of fresh lemon juice to your fruit mixture – it won’t make your cobbler taste lemony, but it will make those peach flavors sing.
Make-Ahead & Serving Ideas
Here’s where cobbler really shines – it’s incredibly forgiving when it comes to timing and storage. You can store your finished cobbler covered in the refrigerator for up to 5 days, making it perfect for meal prep or when you’re hosting guests in New York City and want to get ahead of the game.
For freezing, assemble your cobbler completely but don’t bake it. Wrap it tightly and freeze for up to 3 months. When you’re ready to enjoy it, bake directly from frozen – just add about 15 extra minutes to the baking time.
Reheating is simple: pop individual portions in a 350°F oven for about 20 minutes. Cover with foil if it’s browning too quickly. The microwave works in a pinch, but the oven brings back that lovely crispy-topped texture.
Now for the fun part – serving suggestions. Classic vanilla ice cream remains the gold standard pairing, but don’t stop there. Fresh whipped cream with a hint of vanilla extract feels more neat, while custard or crème anglaise takes things to restaurant-level sophistication.
Creative variations keep things interesting. Try dividing your recipe among 6-8 individual ramekins for dinner parties – they look adorable and eliminate the serving drama. Just reduce the baking time to 20-25 minutes. A cast-iron skillet creates those coveted crispy edges and gives your cobbler serious rustic charm.
Don’t be afraid to mix up your fruit either. Peaches play beautifully with blueberries, blackberries, or sweet cherries. For spiced versions, try adding cardamom, fresh ginger, or even a tiny pinch of black pepper for something unexpected.
Dietary adaptations work surprisingly well too. Gluten-free flour blends substitute nicely in both topping styles – just add 1/4 teaspoon xanthan gum for better binding. Dairy-free versions succeed with coconut milk and vegan butter substitutes, though the flavor will be slightly different.
It’s worth noting that according to scientific research on peach antioxidants, peaches provide significant vitamin C, fiber, and antioxidants. So while cobbler is definitely a treat, you’re getting some nutritional benefits along with all that deliciousness.

Frequently Asked Questions about Peach Cobbler
What keeps peach cobbler from getting soggy?
Nobody wants a soggy cobbler, and the good news is that preventing it comes down to a few simple techniques. The most important factor is moisture control – use exactly 1 tablespoon of cornstarch per 8-10 cups of fruit. This creates just enough thickening power without making your filling gummy or artificial-tasting.
Pre-baking your fruit for 10 minutes works like magic. This step concentrates the natural peach flavors while allowing excess moisture to evaporate before you add the topping. Think of it as giving your peaches a head start in the oven.
Pay attention to your peach selection too. Overripe peaches release too much juice during baking, creating that dreaded watery bottom. If you’re using frozen or canned peaches, drain them thoroughly and pat them dry with paper towels – this extra step makes a huge difference in the final texture.
Can I use canned peaches in a “from-scratch” cobbler?
Absolutely! Don’t let anyone tell you that using canned peaches means you’re not making it from scratch. The key is choosing the right type and preparing them properly.
Look for 2 (16-ounce) cans of sliced peaches packed in juice rather than heavy syrup. The juice-packed varieties taste more natural and contain less added sugar. Drain them thoroughly – we’re talking about really getting that excess liquid out. Pat them dry with paper towels to remove surface moisture.
You’ll want to reduce the sugar in your recipe slightly since canned peaches often retain some sweetness from their packing liquid. The texture will be a bit softer than fresh peaches, but the flavor remains delicious. Many home bakers actually prefer the consistency that canned peaches provide, especially during winter months when fresh peaches are expensive and flavorless.
How do I convert this to a gluten-free peach cobbler recipe?
Converting this peach cobbler recipe to gluten-free is surprisingly straightforward. Replace the all-purpose flour with a 1:1 gluten-free flour blend that contains xanthan gum. These blends are specifically designed to substitute directly for regular flour without complicated conversions.
If your flour blend doesn’t include xanthan gum, add 1/4 teaspoon to help bind the ingredients together. Without it, your topping might crumble apart instead of holding its shape.
The biscuit-style topping adapts much better to gluten-free conversion than cake-style batters. You might notice a slightly different texture – perhaps a bit more tender or crumbly – but the flavor remains excellent.
Here’s a pro tip: let the batter rest for 5 minutes before using it. This allows the alternative flours to hydrate properly, which improves the final texture significantly. Don’t skip this step – it’s the difference between a good gluten-free cobbler and a great one.
Conclusion
There’s something deeply satisfying about pulling a golden-brown peach cobbler recipe from the oven, watching the steam rise from that perfectly imperfect cobblestone topping. You’ve now mastered the techniques that separate exceptional cobblers from ordinary ones – from selecting the right peaches to achieving that ideal balance of fruit and topping.
The beauty of cobbler lies in its welcoming nature. Unlike finicky pastries that demand precision, cobbler accepts your personal touch. Feel confident experimenting with mixed berries in late summer, adding a splash of bourbon for grown-up gatherings, or creating individual ramekin portions for special dinners.
This foundation opens doors to year-round baking trips. The same principles work beautifully with apple cobbler in fall, mixed berry versions in spring, and even winter pear combinations. Each season brings new opportunities to practice these time-tested techniques.
At The Dining Destination, we believe the best culinary experiences happen when traditional techniques meet creative confidence. Whether you’re hosting friends in New York City or simply treating your family to weekend comfort, this peach cobbler recipe connects you to generations of home bakers who understood that the most memorable desserts come from the heart.
The perfect cobbler isn’t about flawless appearance – it’s about that first spoonful of warm, juicy peaches mingling with buttery topping and vanilla ice cream slowly melting into every crevice. That’s the magic you can create, again and again, with these proven methods.
Ready to expand your comfort food repertoire? Our guide to Easy Dinner Ideas offers more inspiration for creating those memorable meals that bring people together around the table.