
Why Perfect Timing Makes All the Difference
How long to boil corn on the cob depends on whether you’re using fresh, frozen, or husked ears, but here’s the quick answer most home cooks need:
- Fresh corn (husked): 3-5 minutes
- Fresh corn (unhusked): 10 minutes
- Frozen corn: 5-8 minutes
- Cold-start method: 10-25 minutes at 180°F
Nothing beats the sweet crunch of perfectly boiled corn on the cob. But as one food expert found through testing over 60 corn samples, the best “boiled” corn isn’t actually boiled at all – it’s cooked using precise temperature control that prevents the tough, chewy kernels that come from overcooking.
The difference between tender, juicy corn and disappointing, shriveled kernels often comes down to just one or two minutes of cooking time. Fresh corn’s natural sugars and moisture content mean it needs far less heat than most people think.
Whether you’re preparing corn for a backyard cookout or looking to master this simple summer staple, getting the timing right transforms an ordinary side dish into something memorable.

How Long to Boil Corn on the Cob?
The magic of perfect corn comes down to simple science: when kernels reach that sweet spot around 170-180°F, they transform from starchy and tough to tender and sweet. Push past this temperature, and you’ll end up with those disappointing, shriveled kernels that taste more like rubber than summer sweetness.
Here’s what really matters for how long to boil corn on the cob: fresh corn needs surprisingly little time – just 3-5 minutes once you’ve removed the husk. The sweeter your corn variety, the less cooking it needs. Those super-sweet varieties from the farmer’s market? They can be ready in as little as 2-3 minutes.
But here’s where it gets interesting. The cold-start method actually produces the juiciest results, even though it takes longer. Place your corn in cold water, heat it to 180°F, then let it steep off the heat for 10-25 minutes. This gentle approach prevents the tough, chewy texture that comes from aggressive boiling while ensuring every kernel cooks evenly.
Frozen corn is your year-round friend and needs 5-8 minutes since it has to thaw and heat through simultaneously. Don’t bother thawing first – toss those frozen ears straight into boiling water for the best results.
When you’re cooking corn with the husk on, plan for about 10 minutes. The husk acts like a natural insulation layer, slowing down the heat transfer but also making it much easier to remove those stubborn silks afterward.
Your visual cue for perfect doneness is beautifully simple: kernels should be bright yellow, plump, and tender when you pierce them with a knife. They’ll darken slightly from their raw state but should never look wrinkled or shriveled. Scientific research on optimal boiling temperature backs up what many home cooks have found – that precise temperature control beats rapid boiling every time.
| Corn Type | Cooking Time | Method |
|---|---|---|
| Fresh (husked) | 3-5 minutes | Boiling water |
| Fresh (unhusked) | 10 minutes | Boiling water |
| Frozen | 5-8 minutes | Boiling water |
| Cold-start | 10-25 minutes | Heat to 180°F, steep |
Fresh Corn: How Long to Boil Corn on the Cob for Peak Sweetness
Fresh corn is like summer captured in a kernel – crisp-tender perfection that requires just enough heat to open up its natural sweetness without destroying that satisfying crunch. The secret lies in understanding that fresh corn’s high moisture content means it cooks much faster than most people expect.
Those super-sweet varieties you’ll find at farmers markets are bred for maximum sugar content and incredibly tender kernels. They’re so delicate that they can be ready in just 2-3 minutes. When you bite into perfectly cooked fresh corn, the kernels should practically burst with sweet juice.
Start your timer once the water returns to a rolling boil after adding the corn. Watch for the kernels to plump slightly and darken by just one shade. The moment they’re tender to a knife tip, remove them immediately. That narrow window between perfectly tender and disappointingly tough is often just a minute or two.
Frozen or Husked: How Long to Boil Corn on the Cob in Any Season
Frozen corn lets you enjoy that summer sweetness year-round, and when you cook it right, it comes remarkably close to fresh. The key difference is timing – frozen ears need those extra few minutes to thaw and heat through completely.
Always add frozen corn directly from the freezer to boiling water. Thawing first leads to uneven cooking and can make your kernels mushy. The frozen kernels will quickly come up to temperature in the rolling boil, and you’ll know they’re ready when they’re heated through and tender.
Husk-on cooking has a wonderful advantage beyond the 10-minute cooking time: those stubborn silks become much easier to remove. After cooking, let the ear cool just enough to handle, then peel back the husk and silk together in one satisfying motion.
When you’re cooking for a crowd, keep that water at a rolling boil between batches. Use a large pot with at least 6 cups of water for 3-4 ears so the temperature doesn’t drop when you add more corn.
Pre-Boil Essentials: Selecting & Prepping Perfect Ears

The foundation of perfectly boiled corn starts long before the water hits a boil. Selecting the right ears and prepping them properly can make the difference between good corn and great corn.
When shopping for corn, timing matters. Corn begins converting its sugars to starch immediately after picking, so the fresher, the better. Sweet corn is typically in peak season from late July through September in North America, though availability varies by region.
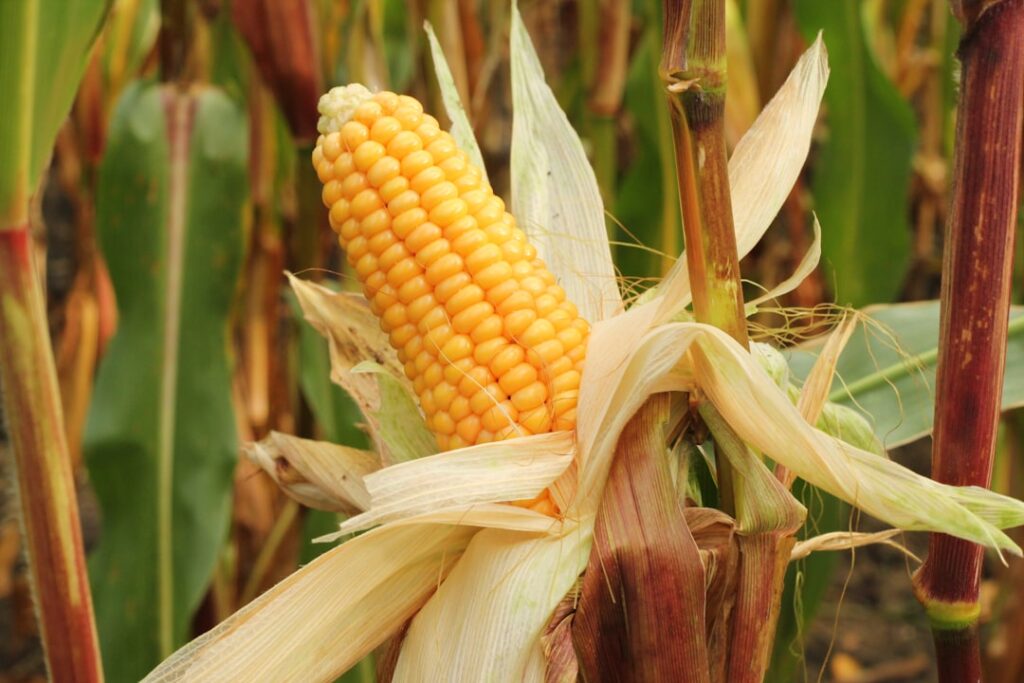
Look for ears with bright green, tightly wrapped husks that feel moist to the touch. The silk should be golden or light brown, not dark or dried out. Give the ear a gentle squeeze – you should feel plump, well-developed kernels underneath the husk.
The paper towel trick for removing stubborn silks is a game-changer: after husking, use a damp paper towel to rub away any remaining silk threads. The texture of the paper towel grabs the silks more effectively than your hands alone.
For removing kernels from the cob, try the Bundt pan hack: stand the ear in the center hole of a Bundt pan and slice downward with a sharp knife. The pan catches all the kernels with no mess.
More info about Ground Beef Recipes can complement your corn perfectly for a complete summer meal.
Choosing the Best Corn at the Market
The best corn shopping happens with your hands as much as your eyes. Here’s what to look for:
Weight test: Fresh ears should feel heavy for their size, indicating plump, well-filled kernels and high moisture content.
Husk inspection: Bright green husks that fit snugly around the ear are ideal. Avoid ears with yellowing, dried, or loose husks.
Silk condition: Fresh silk should be moist and golden. Dark, dried, or slimy silk indicates the corn is past its prime.
Kernel check: If the market allows it, gently peel back a small section of husk to check the kernels. They should be plump, milky, and tightly packed with no missing kernels near the tip.
The earworm myth deserves debunking: finding a small worm at the tip of an ear doesn’t mean the corn is bad. These pests are actually a sign that the corn was grown without excessive pesticides. Simply cut off the affected tip and enjoy the rest.
Quick Guide to Shucking & De-Silking Without the Mess
Shucking corn doesn’t have to be a messy, silk-everywhere ordeal. Here are our tested techniques:
Two-hand pull method: Grip the ear firmly in one hand and use the other to pull the husks down toward the stem end in one smooth motion. Work over a large bowl or directly into your trash can to contain the mess.
Damp paper towel rub: After husking, use a damp paper towel to rub the ear from top to bottom. The paper towel’s texture grabs silk threads that your hands might miss.
Trim both ends: Use a sharp knife to trim about half an inch from both the stem and tip ends. This removes any dried kernels and makes the ear easier to handle.
Foolproof Boiling Method (Step-by-Step)

Here’s where the magic happens – changing those beautiful ears of corn into the tender, sweet perfection that makes summer meals memorable. After testing countless batches, we’ve perfected a method that takes the guesswork out of how long to boil corn on the cob.
Start with a large pot or Dutch oven – at least 6 quarts works best. You’ll need enough water to cover your corn by at least 2 inches, which typically means about half a gallon for 4 medium ears. Having sharp tongs and a timer within reach makes the process smooth and safe.
The secret to consistent results is bringing your water to a rolling boil before adding the corn. This ensures every ear hits the same temperature at the same time. When you’re ready, use tongs to gently lower the corn into the boiling water – no splashing, no burns, no drama.
Once the water returns to a boil, cover the pot and start your timer. For husked fresh corn, 3-5 minutes is your sweet spot. The corn will float slightly and the kernels will brighten to a beautiful golden yellow when they’re ready.
Here’s a pro tip that changed everything for us: test doneness with a knife tip. Pierce a kernel gently – it should give way easily but still have a slight firmness. That’s the perfect texture you’re after.
The moment your corn reaches that ideal tenderness, remove it immediately with tongs. Don’t let it linger in the hot water, as corn continues cooking from residual heat even after you pull it out.
The great salt versus sugar debate has been settled through extensive testing. Adding salt to the water won’t toughen your kernels during these brief cooking times, despite what you might have heard. In fact, a quarter to half cup of sugar in the cooking water can actually improve the corn’s natural sweetness.
One mistake that breaks our hearts every time: never boil corn longer than 8 minutes. Push beyond this limit and you’ll trigger pectin breakdown that turns plump, juicy kernels into tough, shriveled disappointments. Latest research on pectin breakdown shows exactly why timing matters so much for texture.
Rolling Boil vs. Cold-Start: Which Is Right for You?
Both methods have their place in a smart cook’s toolkit, and choosing between them depends on your priorities and timeline.
The rolling boil method is your go-to for speed and familiarity. Water hits 212°F quickly, corn cooks in 3-5 minutes, and you’re done. This approach works beautifully when you need corn ready fast and you’re confident with your timing.
The cold-start method is a game-changer for juiciness and flexibility. You place corn in cold water, heat it gently to 180°F, then turn off the heat and let it steep for 10-25 minutes. This gentler approach produces incredibly juicy corn because it avoids the harsh temperature shock of boiling water.
What makes the cold-start method special is its timing flexibility. Once the water reaches 180°F and you turn off the heat, the corn can sit for up to 30 minutes without overcooking. This is perfect for busy weeknight dinners or when you’re juggling multiple dishes for a gathering.
Common Boiling Mistakes & How to Fix Them
Even seasoned cooks stumble into these corn-cooking pitfalls, but once you know what to watch for, they’re easy to avoid.
Over-boiling breaks more hearts than any other corn mistake. Those tough, shriveled kernels that look like they’ve been through a drought? That’s what happens when corn meets boiling water for too long. The fix is simple: set a timer and trust it.
Crowding the pot seems efficient but backfires every time. Too many ears drop the water temperature dramatically, leading to uneven cooking where some kernels are perfect while others are still raw. Cook in batches if you’re feeding a crowd.
Ignoring visual cues is like cooking blindfolded. Perfect corn kernels are bright yellow and plump – they practically glow with readiness. If they look shriveled, wrinkled, or dull, you’ve pushed too far past the sweet spot.
Serving, Storing & Leftovers

Once you’ve mastered how long to boil corn on the cob, the fun really begins. Perfect corn deserves thoughtful presentation and smart storage strategies that let you enjoy every kernel.
The moment your corn comes out of that pot, it’s at its absolute peak – sweet, tender, and steaming hot. Have your serving platter ready and your favorite toppings within arm’s reach because corn waits for no one.
If you need to keep ears warm before serving, here’s a neat trick: wrap them individually in foil or place them in a 180°F oven. They’ll stay perfectly heated for up to 30 minutes without continuing to cook.
For storage, cooked corn keeps beautifully in the refrigerator for 3-5 days when wrapped tightly in foil or tucked into airtight containers. Want to extend that timeline? Cut the kernels off the cob and freeze them in freezer-safe bags for up to 6 months.
Reheating is simple but requires a gentle touch. Wrap whole ears in foil and warm them at 350°F for 5-7 minutes, or use the microwave in 10-20 second bursts under a damp paper towel. You can even re-boil them for just 1-2 minutes – any longer and you’ll undo all your careful timing work.
The real magic happens when you start thinking of leftover corn as an ingredient rather than just a leftover. Those sweet kernels transform into corn chowder, brighten up fresh salsas, and add wonderful texture to summer salads. More info about Alfredo Sauce Recipe shows how corn kernels can even lift creamy pasta dishes in unexpected ways.
Flavor Boosters & Topping Combos
While butter and salt will always have their place, exploring creative toppings can turn your perfectly timed corn into something truly memorable.
Honey butter creates magic when mixed with softened butter and a pinch of salt. The sweetness plays beautifully with corn’s natural sugars, creating layers of flavor that make each bite more interesting than the last.
For those who like a little heat, jalapeño lime butter brings excitement to the table. Mix minced jalapeño, lime zest, and lime juice into softened butter for a combination that’s both spicy and refreshing.
Elote style corn deserves special mention – this Mexican street corn approach involves slathering ears with mayonnaise, sprinkling with cotija cheese, dusting with chili powder, and finishing with lime juice. It’s messy, bold, and absolutely delicious.
Parmesan herb dust offers an neat twist. Grate fresh Parmesan over hot corn so it melts slightly, then add chopped fresh herbs like basil, cilantro, or chives.
Storage, Reheat & Creative Second-Day Dishes
Smart storage opens up a world of possibilities for your perfectly cooked corn. The key is understanding that whole ears stay moister longer, while cut kernels offer more convenience for recipes.
For refrigerator storage, wrap whole ears tightly in foil or plastic wrap. Cut kernels should go into airtight containers where they’ll maintain their sweetness and texture for several days.
When freezing corn for long-term storage, blanch the ears for 2-3 minutes first, cool them completely, then cut the kernels off the cob. Freeze in portion-sized bags so you can grab exactly what you need for future recipes.
Cold corn eaten straight from the fridge with just a sprinkle of salt makes a surprisingly satisfying snack – proof that properly timed corn retains its natural sweetness even when chilled.
Corn salad comes together beautifully when you mix those sweet kernels with diced tomatoes, red onion, and fresh herbs. Tacos get an instant upgrade when you add corn to Rotisserie Chicken for extra sweetness and satisfying crunch.
Corn chowder transforms leftover kernels into comfort food by simmering them with potatoes, onions, and cream. For a fresh condiment that brightens any dish, make corn salsa by combining kernels with jalapeños, cilantro, and lime juice.

Frequently Asked Questions about Boiling Corn
Does salting the water really toughen kernels?
This old kitchen myth has been thoroughly debunked through modern testing. The short answer is no – salting your water won’t toughen corn kernels when you’re cooking for the proper amount of time.
The confusion stems from the days when people routinely overcooked their corn. If you boil corn for 10 minutes or longer in heavily salted water, yes, you might end up with tough kernels. But since how long to boil corn on the cob is really just 3-5 minutes for fresh ears, salt exposure isn’t long enough to cause problems.
In fact, some cooks find that a pinch of salt in the water helps season the corn evenly. However, most of that salt drains away when you lift the corn out, so you’re not getting much benefit either way.
The bottom line: Don’t worry about salt in your cooking water, but don’t expect it to work miracles either. Save your energy for getting the timing right instead.
How do I keep boiled corn warm without overcooking?
Nothing’s more frustrating than perfectly cooked corn that gets cold while you’re finishing the rest of dinner. Fortunately, corn is surprisingly forgiving once it’s properly cooked.
The easiest method is using residual heat from your cooking pot. Once your corn reaches that perfect tender-crisp stage, turn off the heat and leave the ears in the hot water. Cover the pot to trap the heat, and your corn will stay warm for up to 30 minutes without getting mushy.
For longer holding times, wrap individual ears in foil and keep them in a 180°F oven. This gentle heat won’t continue cooking the kernels but will maintain that just-cooked temperature for up to an hour – perfect for entertaining.
If you’re planning ahead, consider using the cold-start method from the beginning. Since it cooks corn at a lower temperature (around 180°F), you can actually leave the corn in that warm water almost indefinitely without quality loss.
Can I boil different ear sizes together?
Absolutely, though you’ll need to pay attention to timing. Size does matter when it comes to cooking corn evenly, but it’s not complicated to manage.
Small ears cook faster than jumbo ones – sometimes by 1-2 minutes. You have a couple of strategies to handle this. The staggered approach works well: add your larger ears first, then drop in the smaller ones a minute or two later so everything finishes at the same time.
Alternatively, you can add everything together and simply remove ears individually as they reach perfect doneness. Test each ear with a knife tip – when the kernels feel tender, that ear is ready regardless of what the others are doing.
The size difference needs to be pretty dramatic to really matter. If you’re working with ears that are all roughly medium-sized from the same batch, they’ll likely cook at similar rates. It’s only when you’re mixing small ears with truly large ones that timing becomes critical.
Conclusion
Perfect timing really is everything when it comes to how long to boil corn on the cob. Those golden 3-5 minutes for fresh corn, the gentle 180°F cold-start method, and the visual cues of bright yellow, plump kernels – these simple techniques separate memorable corn from the disappointing, chewy disappointments we’ve all experienced.
The beauty of mastering corn lies in its simplicity. Once you understand that fresh corn cooks faster than most people think and that overcooking by even a minute or two ruins the texture, you’ll never second-guess yourself again. Whether you choose the quick rolling boil method for weeknight dinners or the forgiving cold-start approach for entertaining, you now have the knowledge to serve perfect corn every time.
What excites us most is how this one skill opens doors to so many possibilities. From elote-style toppings that transport you to Mexican street corners to creative leftover dishes that extend summer’s bounty, perfectly cooked corn becomes the foundation for countless culinary trips.
At The Dining Destination, we’ve seen how mastering fundamental techniques like this builds confidence in the kitchen. When you nail something as simple as corn on the cob, you start approaching other ingredients with the same attention to timing and technique. That’s where the real culinary magic happens.
Summer corn season may be fleeting, but the skills you’ve learned here will serve you year-round. Whether you’re cooking for family in New York City or experimenting with frozen corn in the depths of winter, you’re now equipped to make every ear count.
Ready to take your culinary journey even further? More info about dining inspirations awaits, where we explore food tourism, dining trends, and culinary experiences that will inspire your next kitchen trip.