
Why Perfect Timing Makes All the Difference
How long should corn on the cob boil depends on your method, but here’s the quick answer most home cooks need:
- Basic boiling: 3-5 minutes in rolling boiling water
- Cold-start method: Heat to 180°F, then steep 10-25 minutes off heat
- Off-heat shortcut: Bring to boil, add corn, cover, turn off heat, wait 10 minutes
- Frozen corn: 5-8 minutes in boiling water
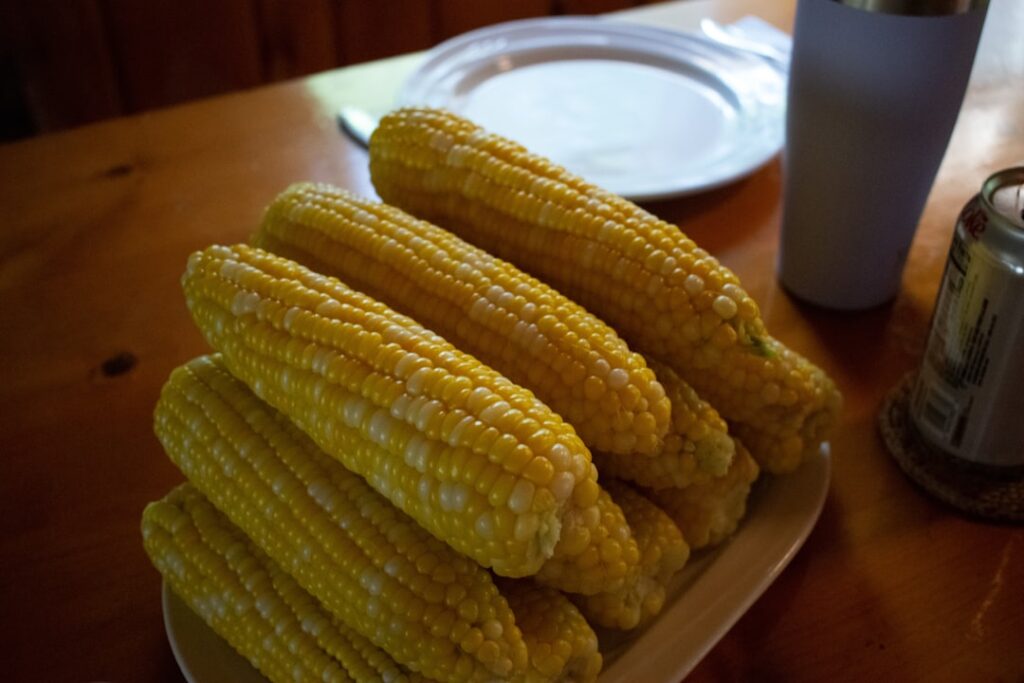
Nothing beats the sweet crunch of perfectly cooked summer corn. Yet so many of us end up with either tough, undercooked kernels or mushy, overcooked disappointments.
The secret isn’t just timing – it’s understanding that modern sweet corn varieties cook faster than you might think. Research from America’s Test Kitchen shows that traditional boiling can actually make corn tough if you’re not careful about temperature and timing.
Fresh corn loses sweetness within hours of harvest, so the fresher your ears, the less cooking time you’ll need. Sugar-improved hybrid varieties (the kind you’ll find at most farmers markets) are naturally sweeter and more tender than older corn types.
Our 3-step method takes the guesswork out of corn cooking:
- Choose & prep the right ears with proper shucking technique
- Master the timing with foolproof boiling methods
- Season & serve like a pro with storage tips for leftovers

Step 1 – Choose & Prep Perfect Ears
The foundation of knowing how long should corn on the cob boil starts way before you even turn on the stove. After testing dozens of ears from farmers markets to grocery stores, we’ve finded that corn quality directly affects cooking time – and the difference can be dramatic.
Picture this: you’re standing in front of a corn display, surrounded by dozens of ears. The best ones practically announce themselves with bright green husks that feel firm and tightly wrapped around the ear. These husks should look fresh and vibrant, not yellowed or starting to pull away from the kernels.
Here’s where many people make their first mistake – they immediately start peeling back husks to peek inside. Don’t do it! Those husks are nature’s perfect packaging, keeping moisture in and air out. Instead, look for moist, golden-brown silks peeking out from the top. If the silks look dry, black, or brittle, that corn has been sitting around too long.
The magic happens when you gently press the husk with your thumb. You should feel plump, tightly packed kernels with no gaps or soft spots. This simple touch test tells you more about freshness than any visual inspection.
Modern sugar-improved hybrid varieties are game-changers for home cooks. These aren’t your grandmother’s field corn – they’re bred to be incredibly sweet and tender, which means they cook faster and stay sweet longer after harvest. When you find these varieties, you’ll need less time in the pot to achieve that perfect crisp-tender bite.
One crucial prep tip: avoid adding salt during this stage. We know it’s tempting, but salt can actually affect how your corn cooks, and we’ll dive into why that matters in Step 2.

How to Select Farmers-Market Fresh Corn
Farmers markets are corn paradise, especially when you can chat with the growers about harvest day. Corn picked that morning will cook faster and taste noticeably sweeter than grocery store corn that might be several days old. The difference is honestly remarkable.
Start with your visual cues: those bright green husks should look like they were just pulled from the stalk. The cut end of the stem should look fresh and moist, not dried out or starting to brown. If you see yellowing or brown patches on the husks, keep looking.
The feel test is your secret weapon. Gently run your hand along the husk – you should feel those plump kernels underneath without any soft spots or gaps. The ear should feel substantial, not light or hollow.
Earweight matters more than you might think. Heavier ears typically have more developed, juicier kernels that will cook more evenly. If you’re buying several ears, try to choose ones that feel similar in weight so they’ll all finish cooking at the same time.
Preparing Corn for the Pot
Once you’ve got your perfect ears, proper prep makes all the difference. Start with a cold water rinse while the corn is still in its husk. This simple step removes field debris and makes the whole shucking process cleaner and easier.
Husk removal is straightforward once you know the trick. Grab the corn at the top where the silks emerge, then pull the husks down in long strips using both hands. Work over a large bowl or your compost bin – trust us, this gets messy fast! Fresh corn husks should come off in large, clean pieces.
Silk removal used to drive us crazy until we finded this game-changing method. After removing the husks, run the corn under cold water while rubbing with a clean dish towel. The silks practically fall off when they’re wet. For any stubborn silks that cling on, a soft vegetable brush works wonders.
When trimming ends, less is more. Only cut off dry or damaged portions of the stem end – just enough to create a clean edge. Some cooks like to trim the pointed tip too, but it’s completely optional and doesn’t affect cooking time.
Here’s our favorite bundle silks trick: collect all those silks in a large bowl instead of letting them scatter everywhere. They’re actually edible and make a surprisingly good herbal tea, or they’re excellent for your compost pile.
Keep knife safety in mind during prep. Fresh corn kernels are naturally tender, so you shouldn’t need to cut into them before cooking. Save the knife work for after they’re perfectly cooked.
Step 2 – How Long Should Corn on the Cob Boil?
Here’s where things get really interesting – and where most home cooks either nail it or completely mess it up. How long should corn on the cob boil isn’t just about setting a timer. It’s about understanding what’s actually happening inside those kernels when heat hits them.
First, let’s talk water volume. You need enough water so that when you drop in your corn, the temperature doesn’t plummet. Think at least 6 cups of water for up to 4 ears. More corn than that? Cook in batches. Trust me on this one – overcrowding is the enemy of evenly cooked corn.
Now here’s the science that changed everything for us: corn kernels start their magic at around 180°F. That’s when starch gelatinization kicks in (the starch swells and gets tender) and pectin breakdown begins (the stuff that gives kernels their structure starts dissolving). The trick is hitting that sweet spot where kernels become tender without turning into mush.
We used to think a rolling boil was the only way, but research from America’s Test Kitchen shows that gentler methods often produce better results. Too much heat actually makes kernels tough – the opposite of what we want.
Altitude matters too. If you’re cooking above 3,000 feet, water boils at a lower temperature, so add 1-2 minutes to your cooking times. And remember that batch size affects everything – more than 4 ears in a standard pot drops the water temperature too much for even cooking.
You can add aromatics to your cooking water if you want – a squeeze of lemon, a pinch of sugar, even some Old Bay seasoning. Just avoid salt, which can actually toughen the kernels.

Basic Boil: 3–5 Minutes – how long should corn on the cob boil
The classic method still works beautifully when you do it right. How long should corn on the cob boil this way? Start your timer once the water returns to a full boil after adding the corn – not before.
Watch for those bright yellow kernels to really pop in color. They should look plump and feel crisp-tender when you test them with a fork. You want that perfect bite – tender but not soft or mushy.
Here’s something that surprised us: don’t salt your boiling water. We tested this extensively, and salt actually interferes with the kernels’ natural moisture, making them tougher. Stick with plain water for the best texture.
The biggest mistake we see? Crowding the pot. When you cram too many ears in at once, the water temperature drops and you get uneven cooking. Some ears end up overcooked while others stay tough. It’s worth cooking in batches for consistent results.
Cold-Start Method: 180 °F Steep – how long should corn on the cob boil
This method consistently gives us the juiciest, most tender corn. Instead of waiting for water to boil, you start everything cold and heat it together.
Put your shucked corn in a large pot and cover with cold water. Heat until the water hits 180°F – you’ll need an instant-read thermometer for this. Once you reach temperature, turn off the heat, cover the pot, and let everything steep for 10-25 minutes depending on how many ears you’re cooking.
The juiciness benefits are incredible. This gentle heating prevents the aggressive bubbling that can make kernels tough. The corn essentially steams in its own moisture at the perfect temperature.
Thermometer usage is key here – without it, you’re just guessing, and that defeats the whole purpose of this controlled method.
Off-Heat “Cut-and-Wait” Shortcut
This one’s a game-changer for busy weeknights when you need meal-timing flexibility. Bring your pot of water to a rolling boil, add the corn, cover immediately, and turn off the burner. Then just walk away for 10 minutes.
The residual heat does all the work while keeping your corn warm until you’re ready to serve. You can actually leave it in the covered pot for up to 30 minutes without overcooking – perfect when you’re juggling multiple dishes.
It works because that hot water (around 200°F when you turn off the heat) gradually cools while the corn continues cooking gently in the trapped steam.
Steaming & Microwaving Alternatives
Steaming uses just 1 inch of water in a large pot with a steamer basket. Bring it to a boil, add corn, cover, and steam for 3-4 minutes. Less water, less energy, excellent results.
For microwaving, leave the corn in its husk and cook for 2-3 minutes per ear. Multiple ears? Add about 30 seconds per additional ear. The husk acts like a natural steamer, and bonus – the hot husk makes silk removal so much easier afterward.
The microwave method is especially great for just one or two ears and saves tons of energy. Plus, no pot to clean!
These quicker methods pair perfectly with other speedy sides – check out our Easy Dinner Ideas for more inspiration.
Step 3 – Season, Serve & Store Like a Pro
Now that you know how long should corn on the cob boil, let’s talk about changing that perfectly cooked corn into something truly special. The right finishing touches can lift simple boiled corn from a basic side dish to the star of your summer table.
Compound butters are absolute game-changers here. Mix softened butter with fresh herbs like chives, parsley, or cilantro for an instant flavor boost. A pinch of garlic powder, smoked paprika, or your favorite spice blend takes things even further. The best part? You can make these ahead and keep them in the fridge for weeks, ready whenever corn season calls.
For those who love bold flavors, elote-style toppings bring the magic of Mexican street corn right to your kitchen. Brush your hot corn with mayo or Mexican crema, then sprinkle generously with cotija cheese or parmesan. A dusting of chili powder and a squeeze of fresh lime juice, finished with chopped cilantro, creates that perfect balance of creamy, spicy, and tangy that makes elote so irresistible.
Spice blends open up endless possibilities too. Everything Bagel seasoning adds a savory crunch, while Old Bay brings that classic seafood boil flavor. Even a simple mix of salt, pepper, and paprika can make your corn feel restaurant-worthy.
Here’s a butter-stick trick that’ll change your corn game forever: instead of struggling to spread cold butter on hot corn with a knife, peel back the paper wrapper on one end of a cold butter stick. Use the exposed butter like a crayon to coat the corn evenly. It’s so much easier and gives you perfect coverage every time!
Keeping corn warm becomes important when you’re coordinating multiple dishes. Wrap cooked corn in foil and keep it in a 180°F oven, or try the cooler method – place hot corn in a clean cooler where it acts like a thermos, staying perfectly warm for up to an hour.
Leftover storage is straightforward but important to get right. Cooked corn keeps in the refrigerator for 3-5 days when stored in an airtight container or wrapped tightly in plastic wrap. For longer storage, cut kernels off leftover cobs and freeze them in portion-sized bags. Those frozen kernels keep for up to 12 months and work beautifully in soups, salads, and casseroles throughout the year.

Flavoring the Boil Water (Optional)
While we strongly recommend keeping your cooking water unsalted, you can add other aromatics for subtle flavor improvements that won’t affect the corn’s texture.
Adding half a lemon (both juice and rind) to the cooking water brings a lovely brightness that complements corn’s natural sweetness. A tablespoon of sugar can actually boost the sweetness, especially helpful with older corn that may have lost some of its natural sugars.
Old Bay seasoning adds a teaspoon of subtle spice complexity without the salt concerns that can toughen kernels. A few bay leaves contribute an herbal note that pairs surprisingly well with corn’s earthy sweetness.
The salt toughening myth keeps popping up in recipes, with some sources claiming a little salt is fine. Our consistent testing shows that even small amounts can affect kernel texture, making them less tender than they should be. When in doubt, always season after cooking rather than during – you’ll get better results every time.
Holding & Reheating Cooked Corn
Sometimes timing doesn’t work out perfectly, and you need to keep corn warm or reheat leftovers. The cooler method works brilliantly for keeping corn at serving temperature – place hot, cooked corn in a clean cooler lined with clean towels. This technique keeps corn perfectly warm for up to an hour, making it ideal for potlucks or when you’re cooking ahead for a crowd.
For reheating individual ears, create an oven foil pack by wrapping each ear in foil with a pat of butter, then heating at 350°F for 5-7 minutes. The steam created inside the foil gently warms the corn without drying it out.
Microwave reheating requires a gentle touch. Place corn on a microwave-safe plate, cover with a damp paper towel, and heat in 10-second bursts until warmed through. The key is patience – overheating will give you tough kernels that defeat the purpose of cooking them perfectly in the first place.
The stovetop re-blanch method works especially well for corn you plan to cut off the cob. Simply drop leftover corn into boiling water for just 1-2 minutes to reheat. This quick warming brings back that just-cooked texture without overcooking.
Frequently Asked Questions about Boiling Corn on the Cob
Does freshness change how long should corn on the cob boil?
The freshness of your corn makes a huge difference in cooking time! Fresh corn picked within 24 hours has higher moisture content and more natural sugars, which means it cooks much faster than corn that’s been sitting around.
Fresh corn cooks faster because those tender kernels haven’t had time to convert their sugars to starch. If you’re lucky enough to get same-day corn from a farmers market, start checking for doneness at just 2-3 minutes. The kernels will look brighter and feel wonderfully plump when they’re ready.
Grocery store corn that’s been around for several days needs the full 5-minute treatment. The kernels have toughened up a bit and lost some moisture, so they need more time to become tender. This older corn actually benefits from our cold-start method since the gentler heating helps compensate for the lost moisture.
Here’s a simple test: press a kernel gently with your fingernail. Fresh corn will feel softer and release a bit of milky juice, while older corn feels firmer and drier.
Should I salt, sugar, or leave the water plain?
Leave the salt out entirely – this is one cooking myth we need to bust! Our extensive testing shows that salt actually toughens corn kernels by drawing out their natural moisture. Even a small amount can make your perfectly timed corn feel chewy instead of tender.
Sugar is a different story. Adding a tablespoon of sugar to your cooking water can boost the natural sweetness without affecting texture. This trick works especially well with older corn that’s lost some of its natural sugars.
If you want to add flavor to the cooking water, try these salt-free options: squeeze in half a lemon for brightness, toss in a couple of bay leaves for subtle herbal notes, or add a splash of white wine for extra depth. These additions won’t interfere with the corn’s texture.
Save all your seasoning – butter, salt, herbs, and spices – for after cooking. This way you get maximum flavor impact without any risk of tough kernels.
Can I freeze corn before or after boiling?
You can absolutely freeze corn both ways, but the technique matters for getting good results later.
Freezing raw corn works beautifully if you leave it in the husk. The natural wrapper protects the kernels from freezer burn for up to 12 months. When you’re ready to cook, you can boil frozen corn straight from the freezer – just add 2-3 extra minutes to account for the frozen temperature. How long should corn on the cob boil when frozen? About 6-8 minutes total.
Freezing after cooking is trickier if you want to eat it on the cob later. Fully cooked corn can get mushy when reheated from frozen. The secret is to slightly undercook it first – just 2-3 minutes in boiling water, then shock it in ice water to stop the cooking process.
For the best freezer results, wrap each ear individually in plastic wrap after it’s completely cool, then store them in freezer bags. If you’re planning to use the corn in recipes rather than eating it on the cob, cut the kernels off before freezing. They’ll stay much more versatile for adding to soups, salads, and casseroles later.
Conclusion
Perfect corn doesn’t have to be complicated. Once you understand how long should corn on the cob boil and why timing matters so much, you’ll never go back to guessing or overcooking those beautiful summer ears.
Our 3-step roadmap takes the mystery out of corn cooking entirely. Start by choosing fresh ears with bright green husks and silky, moist tassels – this foundation makes everything else easier. Master your preferred timing method, whether that’s the classic 3-5 minute boil, the gentle cold-start approach, or our convenient off-heat shortcut. Finish like a pro with compound butters, creative seasonings, and proper storage so nothing goes to waste.
The biggest mistake we see home cooks make? Overcooking every single time. Corn kernels keep cooking even after you pull them from the heat, so it’s always better to check early and add more time if needed. Those mushy, deflated kernels are almost impossible to fix once they’ve gone too far.
Don’t be afraid to experiment with timings once you’ve got the basics down. Your corn’s freshness, your altitude, even your personal texture preferences all play a role. Some families love corn with serious crunch, while others prefer it completely tender. The beauty of understanding the science is that you can adjust confidently.
There’s something magical about perfectly cooked corn that brings people together around the dinner table. Whether you’re serving it alongside barbecue favorites, cutting the kernels into fresh summer salads, or just enjoying it with a pat of butter and a sprinkle of salt, getting that timing right transforms a simple vegetable into something special.
Summer cooking is all about celebrating fresh, seasonal ingredients without overcomplicating them. For more inspiration on creating memorable meals with simple techniques, check out our Easy Dinner Ideas collection.
At The Dining Destination, we believe that great cooking starts with mastering the fundamentals – and there’s nothing more fundamental than knowing exactly how long should corn on the cob boil. From our home base in New York City, we’re always exploring how simple techniques like this connect us to food traditions from around the world, because the best culinary trips often start right in your own kitchen.